
In this tutorial I will show you how you can set up your TP-link router in repeater mode to extend your internet connection in other areas of your house, office. For this we do not need any other third party firmware as tp-link router firmware have inbuilt functionality to be used as a repeater.
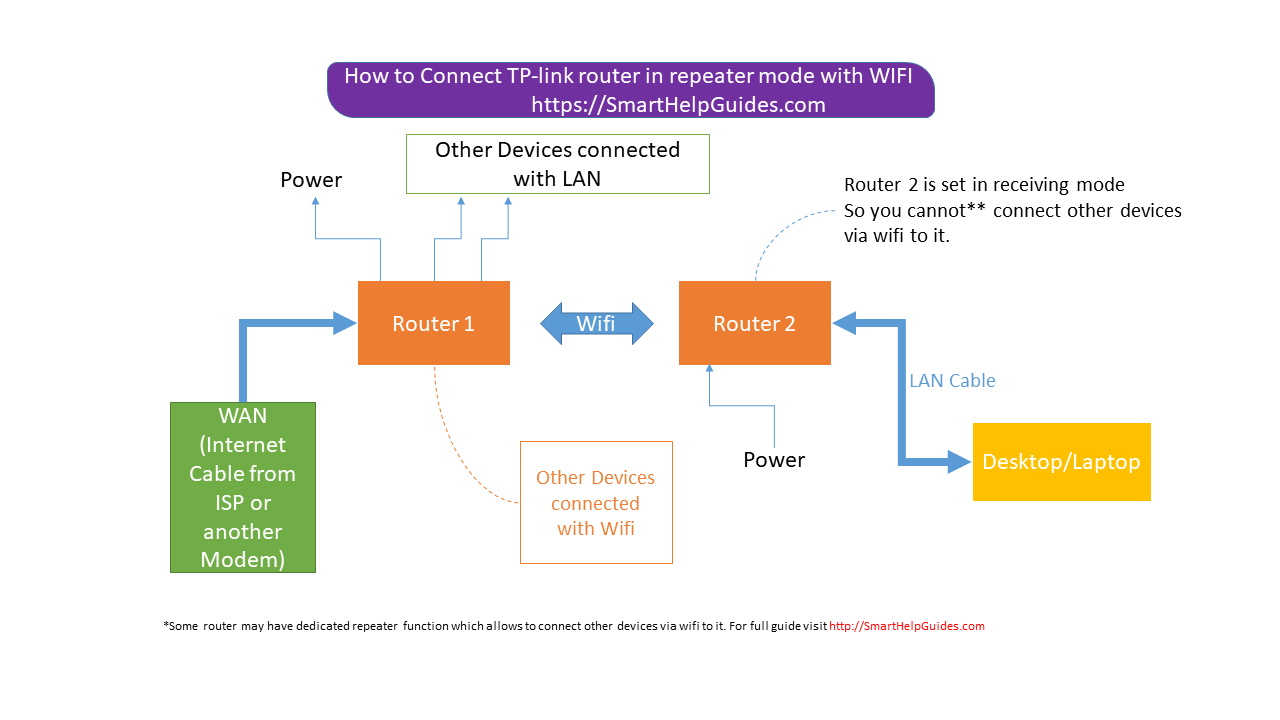
To make things easy to understand I have created a flow chart explaining how this setup will work and provided step by step instructions with images.
As you can see in the above chart you cannot connect other wireless devices to the 2nd tp-link router via wifi as it is set in receiving mode and connected to 1st router via wifi (wireless). To use internet on 2nd router you have to connect any device via LAN to it as shown in the chart.
If you want to connect other wireless devices to the 2nd router without lan cable, you will have to use an extender or if you can connect both router with LAN cable then also you can have wifi service on the second router.
You can also use this setup if you have an extra router laying around and want to connect a desktop without a wireless network card in other room.
This instructions are only for setting your 2nd router, your 1st router should be configured already. Learn how to configure your 1st router.
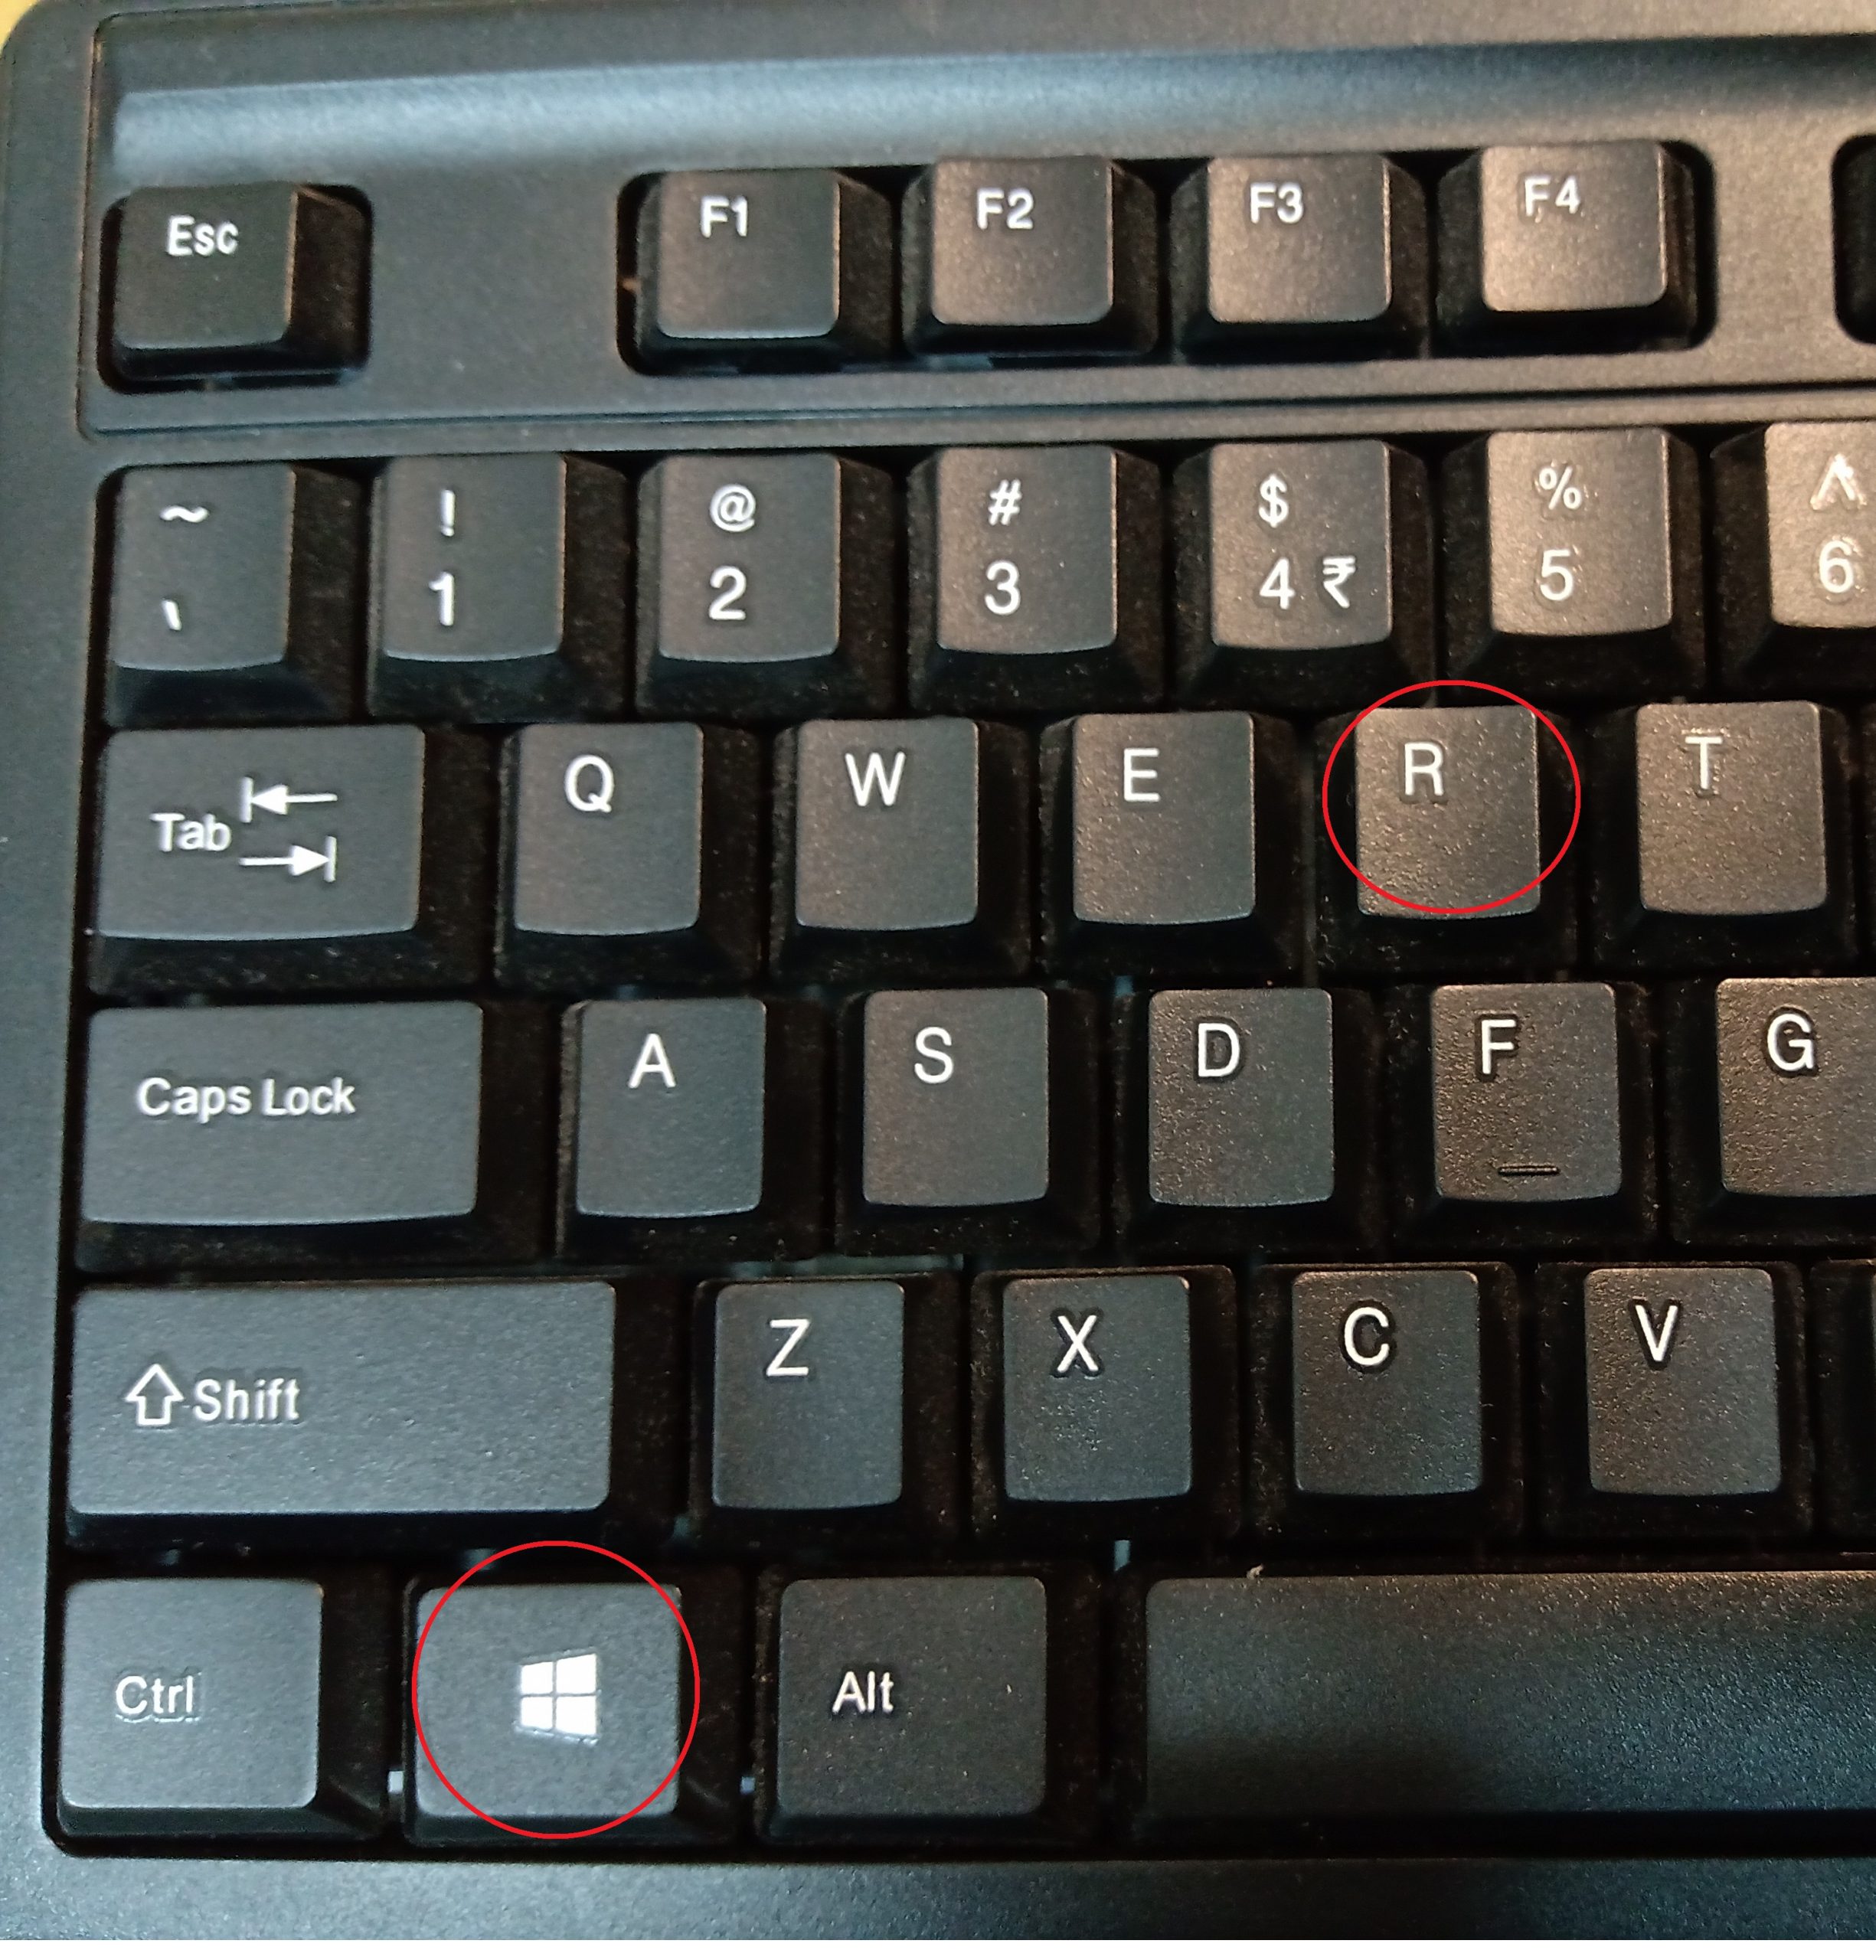
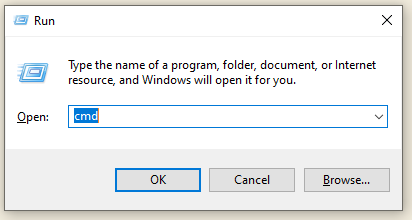
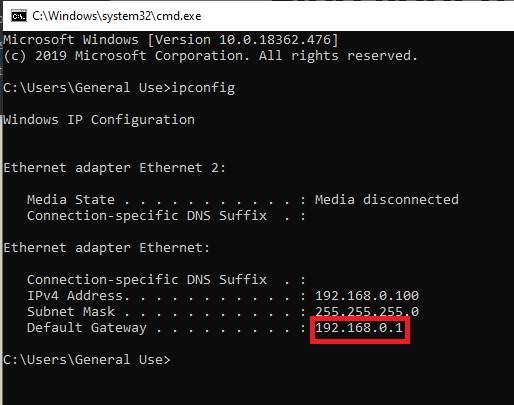
Find your router IP
- Type Win+R
2. Type cmd
3. Type ipconfig
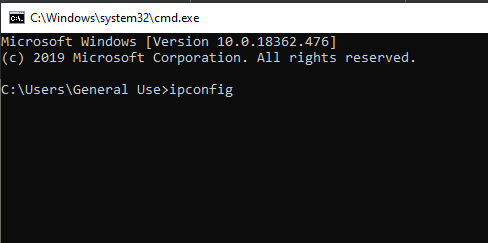
4. Note down the router gateway ip
Configure Router as repeater
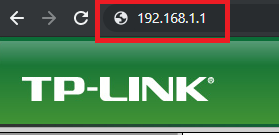
- Open Browser and type router ip
 2. Enter username and password. If you have not changed username password, default username and password both is ‘admin’ (without quotes in lowercase).
3. In Network settings go to LAN settings and change your ip to 192.168.1.1 this is to prevent conflict of ip between your 1st and 2nd router. IP of both router should be different check above instructions to find your router ip.

4. Your router will restart then repeat step 1 & 2 to login with new IP 192.168.1.1
Wireless Settings
- Now go to wireless setting.
2. Set network name, region, channel info same as in your first router.
3. Tick enable WDS bridging.
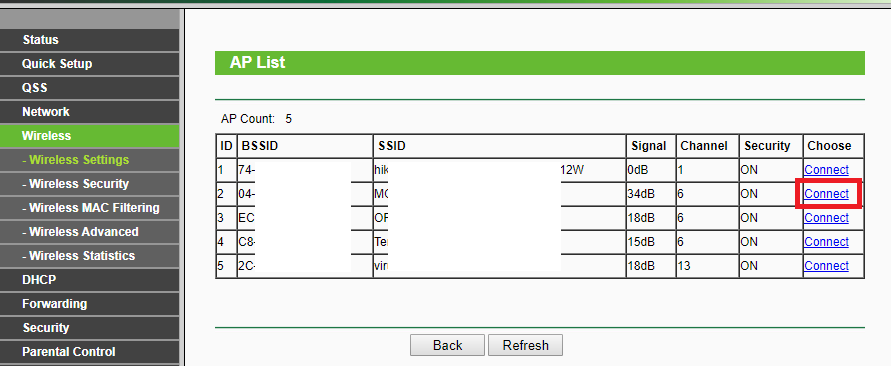
4. Click on survey
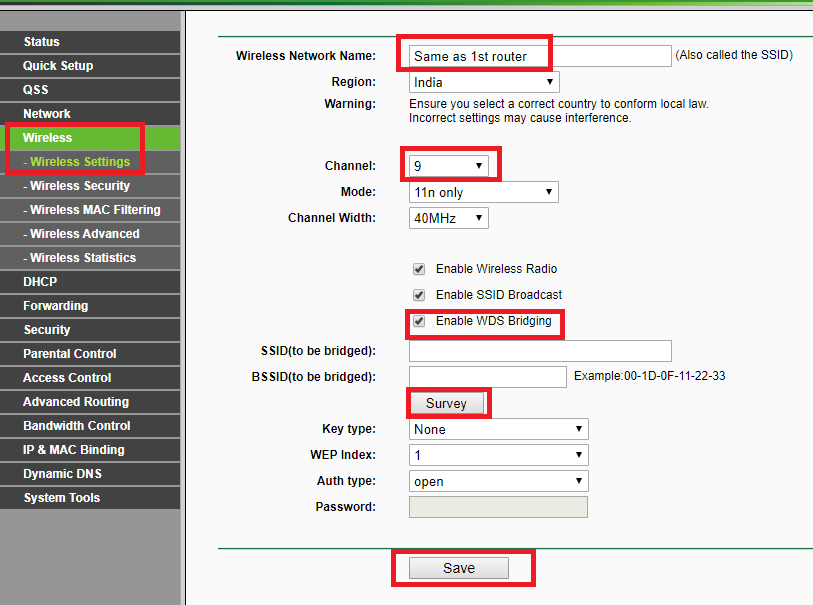
5. Select your first router and click on connect
6. Now select key type WPA2-PSK as shown in pic again this setting depend upon your first router settings.
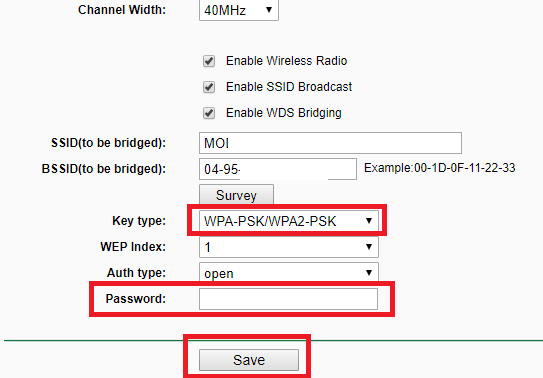
7. Enter password of your first router wifi and click Save.
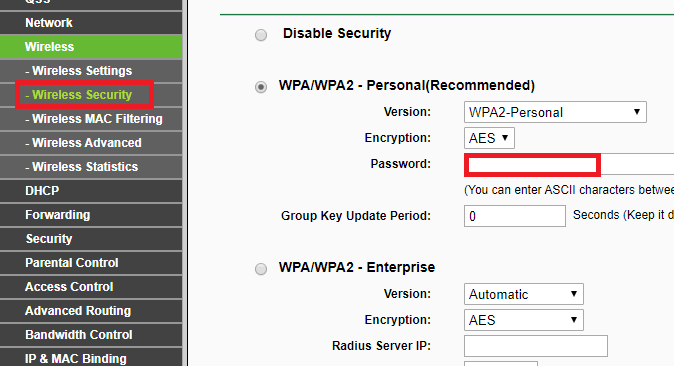
8. Go to Wireless Security and set your wifi password same as before and click Save.
Disable DHCP
- Now go to DHCP settings and disable DHCP server then Save.
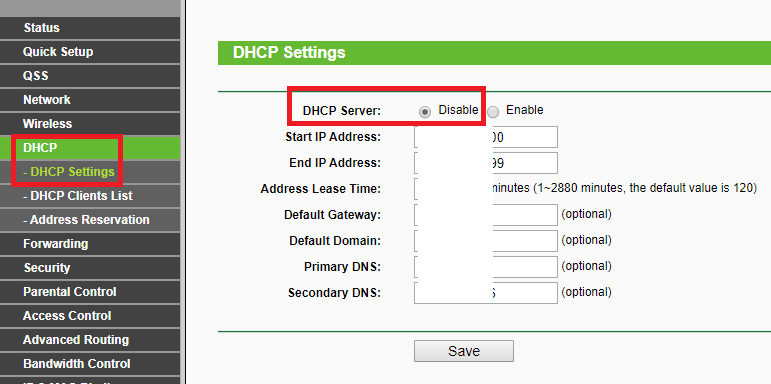
If you do not disable DHCP it will create double NAT which can create problem with some applications. In this setup our first router is managing the DHCP server IP allocation and we do not need second router DHCP server.
Finally Restart your router and you should have access to internet. To check open browser and open any site.
If you have any trouble following instructions ask below in comments. Your internet speed may decrease a bit if both router are located very far from each other, ideal location of second router would be where you are getting atleast good level wifi signal from 1st router.
This article was published on https://smarthelpguides.com/
Credits Note: All images and screenshots are taken by the author and is copyrighted.
References:-
- WDS Bridging –https://www.tp-link.com/us/support/faq/227/

Hi! I have been creating WordPress Website for 5+ years and create tutorials for beginners on my website and youtube channel.