Step#1 Sign up for Vultr.
Step#2 Install Plesk
Step#3 Configure glue dns records and Verify changes.
How to glue dns records – https://docs.plesk.com/en-US/obsidian/administrator-guide/dns/putting-your-website-online.72225/#using-plesk-as-the-primary-dns-server
Verify DNS records – https://lookmydns.com/#/A/
If you need help with glue records for other registrar please comment on youtube video.
Step#4 Setup plesk account
Step#5 Add new domain
Step#6 Issue ssl
Step#7 Install WordPress
Step#8 Enable caching
Step#9 Enable email
You also need to enable Reverse DNS to get full 10/10 score
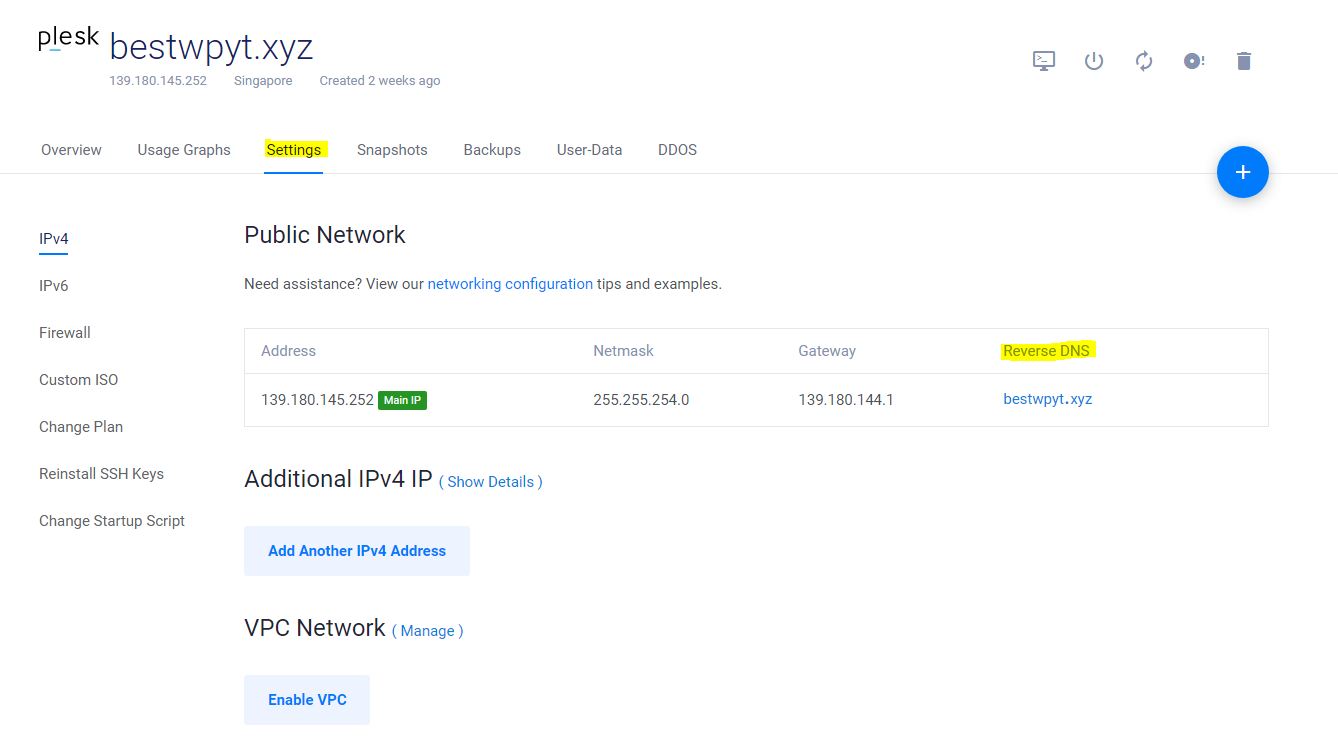
- To enable reverse DNS
- Go to your vultr dashboard
- Select the server instance
- Go to Settings Tab
- Edit Reverse DNS as shown in screenshot above
Step#10 Check firewall and antivirus
Related tutorials
Will be updated soon.
FAQ
Why emails not working?
Ask vultr support to open port 25. Make sure to not send mass marketing emails from vps use it only for transactional emails.
Why browser in not loading website after changing DNS?
Please clear your cache. Try with a different device like your mobile or browser for verification.

Hi! I have been creating WordPress Website for 5+ years and create tutorials for beginners on my website and youtube channel.