In this tutorial we are going to install Plesk Web Admin SE Control Panel on Vultr VPS. This allows you to create 3 websites and unlimited sub-domains completely for free on per VPS instance. This free offer is limited to some VPS providers only, for other VPS providers which are not supported you will have to buy Plesk Control Panel license. So it is recommended to use Vultr VPS which offers really great performance at affordable price. You can click on Special Offer below to learn how to get free $100 Vultr VPS credit to try their service.
Signup for Vultr VPS
This is really easy all you need is an email and a payment method like Credit Card, Paypal etc.
Full Plesk Control Panel and WordPress Setup Video
✔ Recommend Method (Personal DNS Server)
Alternative Method (Third party DNS Server)
Deploy New VPS Server and Install Plesk Control Panel
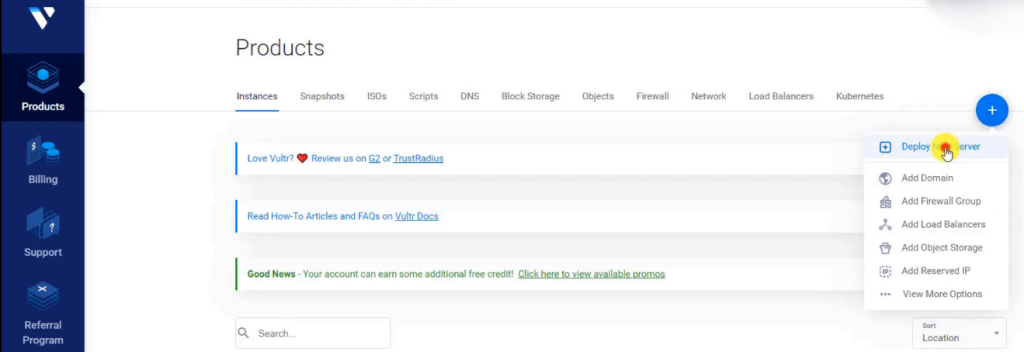
Step 1. Click on Deploy New Server
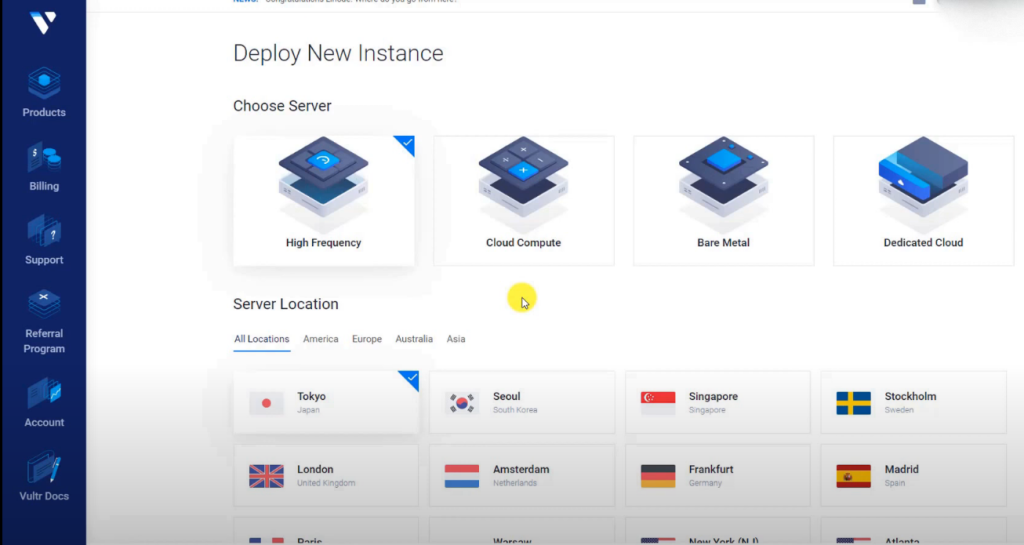
Step 2. Select Server Type
- High Frequency cost $1 extra and gives better performance. Plans start from $6 per month.
- Cloud Computer Regular Server Plan starts from $5 per month.
Both these plans can easily handle 2-3 small wordpress websites while offering good performance.
Step 3. Select Location of Server which is closer to your audience
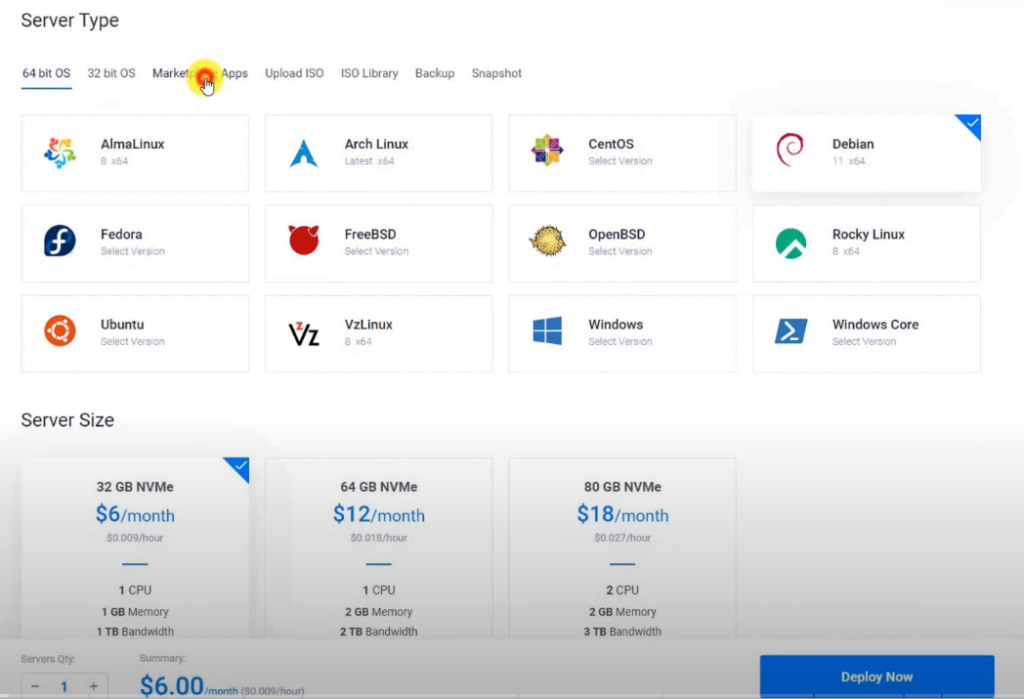
Step 4. From Market Place Select Plesk Web Admin SE
Step 5. Select Server Size
- 1 GB plan can host 2-3 small WordPress non e-commerce sites or single small woo-commerce Website.
- 2 GB is recommended for big E-commerce type WordPress Website
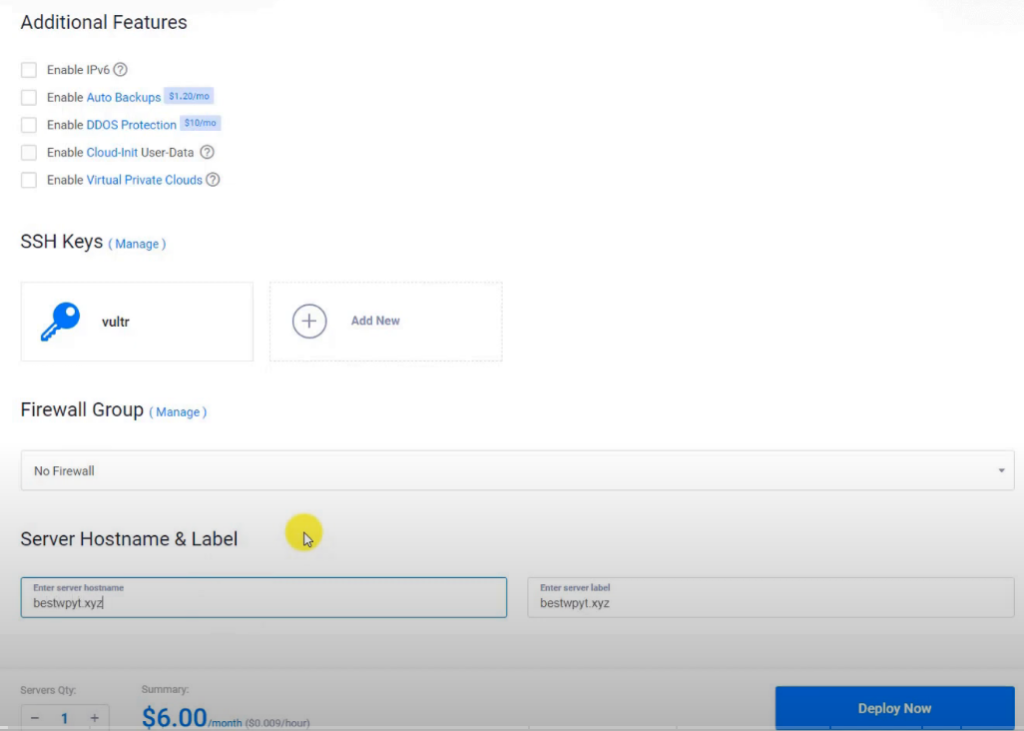
Step 6. Enter Server Hostname which can be your domain.com or sever.domain.com This can be changed later also.
Step 7. Click on Deploy now
Step 8. Wait of 10-15 minutes for Server OS and Plesk Control Panel Installation process to complete.
Step 9. Click on Server Instance we just created. Server Status should be running
Step 10. Login to Plesk Control Panel
You can find the login link and credential on Vultr Website. Login url is https://serverip:8443 and credentials will be root and password.
Ignore the SSL certificate error as shown in the video.
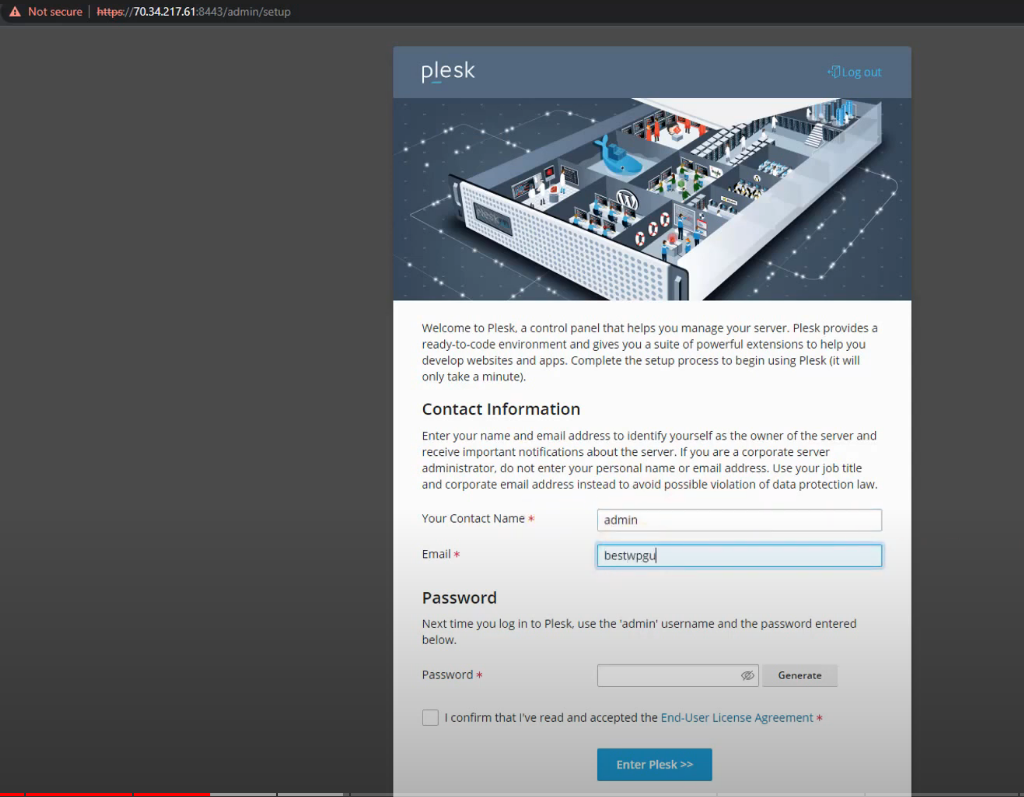
Step 11. Create new Plesk login account
Congratulations we have successfully installed plesk control panel on our VPS for free.
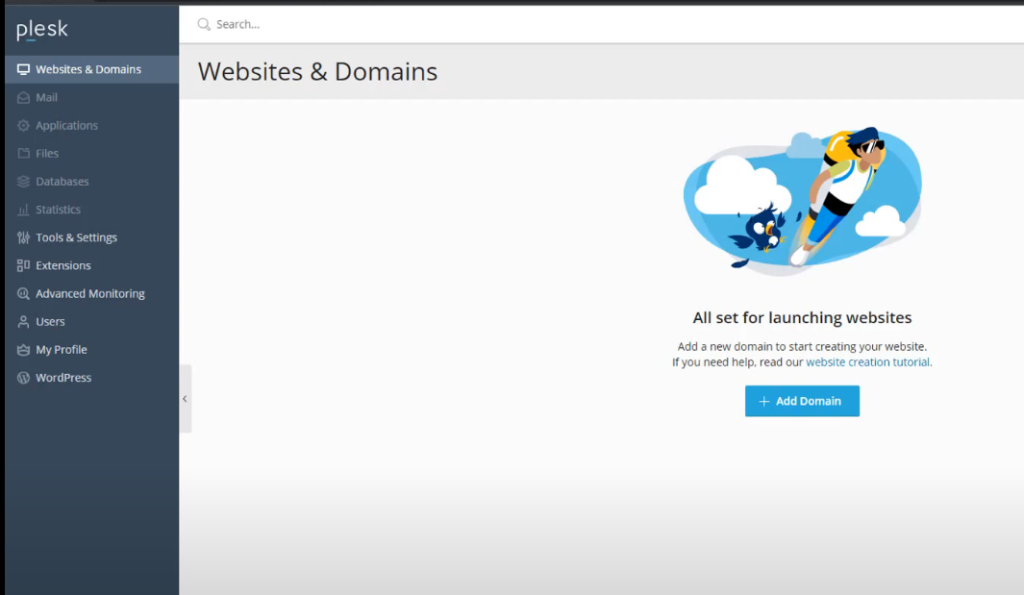
How to Create Website on Plesk
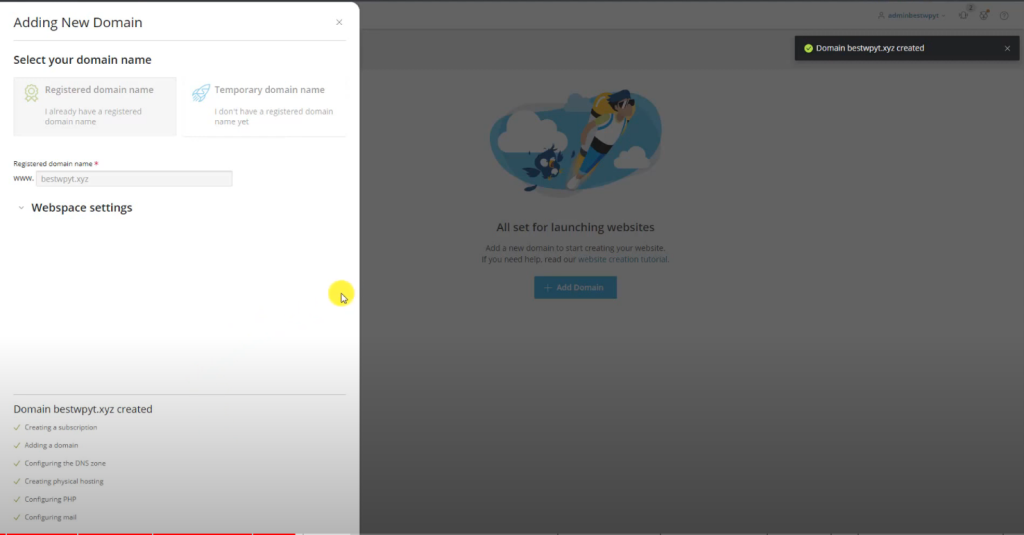
Step 1. Add your domain in Plesk Control Panel dashboard
Step 2. Add necessary DNS records.
Step 3. Install WordPress or any other different script you want to. You can use file manager and One Click Script Installation.
How to Add DNS records for Domains on Plesk Control Panel
There are 2 methods to point your domain to plesk. I have created 2 full plesk and wordpress setup videos on my video so depending upon the video you watched or method you want to follow choose either options given below.
Using Third party DNS Server
In this method we are going to use our domain registrar DNS server or if you for any reason you want to create the DNS records manually. I would suggest to use the other option personal DNS server option if you are not sure.
If you use this option then you will have to follow this tutorial to use email with your plesk server
Add the following DNS records :-
Important Update:
Please add these important records as shown at 11:23 mins in video. If you add all 4 records given below then you won’t have to add the TXT acme challenge record shown at 19:35min in the video. You can directly click on reload button to issue ssl. This way you won’t have to worry about renew ssl manually.
| Host | Type | Record Value |
| @ | A | server ip |
| www | CNAME | yourdomain.com |
| ftp | A | server ip |
| _acme-challenge | NS | yourdomain.com |
Using Personal DNS Server
This method allows us to use our personal DNS server with plesk which means all we need to do is update the nameserver records with our domain registrar.
- NS1.YOURDOMAIN.COM
- NS2.YOURDOMAIN.COM
Advantage of this method is whenever you add a sub-domain or you want to use email, ssl auto-renewal you won’t have to add new records manually to any third party dns system. All required changes will happen automatically and completely managed by Plesk.
How to add Glue records
For namecheap I have shown in video. For other registrars you can google how to do it.
How to check DNS Status
To check A record – https://lookmydns.com/#/A/example.com/
To check TXT records – https://lookmydns.com/#/TXT/
How to Setup Email with Plesk
If you have used the third party DNS option then you will have to watch this video to enable mail server on plesk. If you have watched tutorial in which we used personal DNS server then we only need to create new email accounts which was also explained in that video.
Step by Step info to enable mail server on plesk.
How to Enable SSL
With Plesk you can get free SSL certificate from Lets encrypt for your hosted domain. Your domain must be pointing to your server ip for SSL certificate to be issued.
How to Install WordPress
You can use the wordpress toolkit option to install wordpress on plesk control panel with one click process.
Other Related Tutorials
How to setup SMTP for wordpress email sending
Vultr Plesk Security and Backup Tutorial
Vultr VPS with Cloudflare Guide
How to Migrate to Vultr WordPress Hosting with minimal downtime
How to use Object Cache with Plesk for WordPress Perfomance Boost
Other tutorials links will be updated soon.
FAQ-
Is Plesk Web Admin Free?
Yes plesk web admin control panel is free with some vps providers for 3 domains and unlimited sub-domains.
Why SSL certificate is not getting issued?
Wait after adding the acme txt record. Using below links check record is set correctly. Do not close the acme page and reload after 15-20 mins. Everytime you reload acme record txt will change and you will have to reupdate the record. Other solution for this is using a different SSL certificate other than letsencrypt I will create tutorial about it soon. Or you can use glue records that tutorial will also be created soon.
Why I still cannot see new WordPress page?
DNS record propagation takes time. If dns check link below shows ip has been updated. Try clearing your dns cache (google ipconfig/flushdns). Try different browser and device like your mobile, you could be seeing old page because of caching.
Why my Emails are not working?
Vultr and almost all VPS providers block port 25 required for sending emails by default. You can contact customer support to unblock it mentioning you do not intend to spam or send mass marketing emails from VPS. Or use SMTP provider. Detailed video tutorial is planned about this.
VPS Billing
Note: If you don’t like the VPS and don’t want to use it. Completely destroy it to stop billing. Destroy option is available on vultr website. Stoping VPS doesn’t stop billing only destroying it does.
Temporary Domain
Do not use temporary as that in my trials it caused a lot of issue and strongly not recommended.

Hi! I have been creating WordPress Website for 5+ years and create tutorials for beginners on my website and youtube channel.